


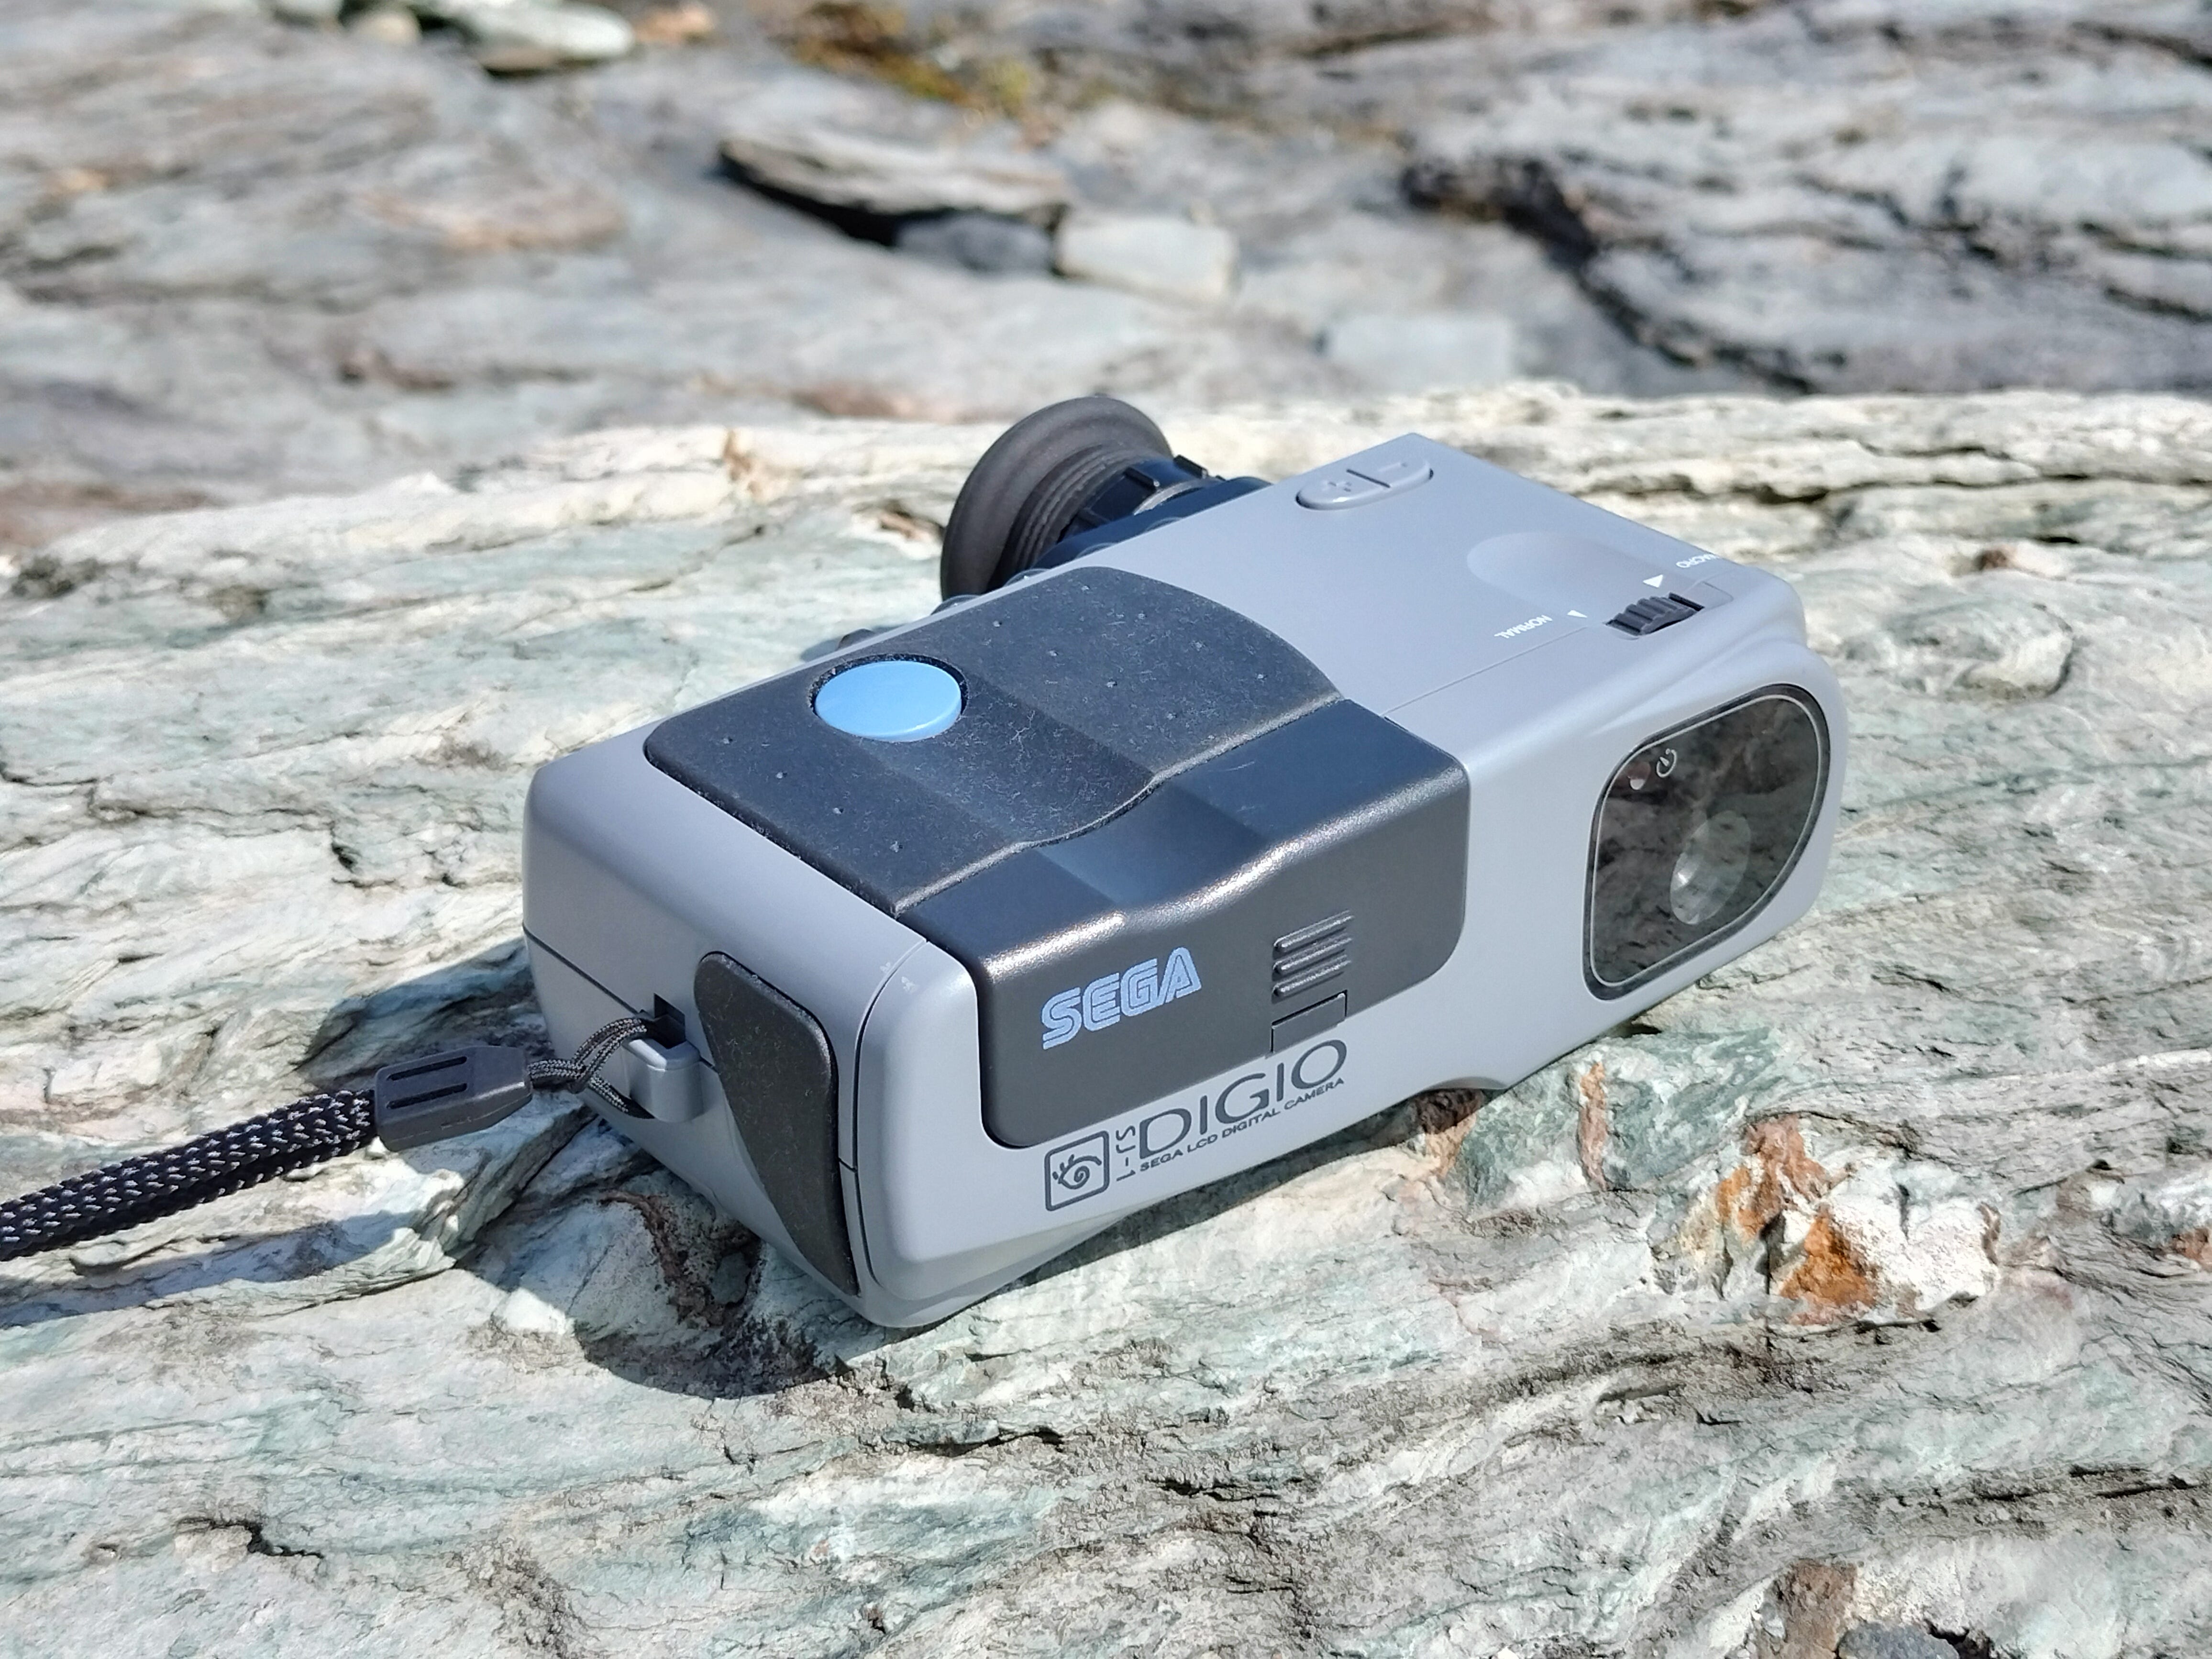
Sega Digio SJ-1
Let me talk to you about our lord and savior Sonic the Hedgeho- Erm... Sorry, wrong blog.

Sega. Yes, THAT Sega. In 1996, they made a digital camera. It apparently wasn’t designed as a console accessory like the Nintendo Gameboy Camera that came out 2 years later, but more of a general purpose digital camera for capturing all of life’s moments. LGR has a thorough video about the history of the device, so I won’t delve too deeply into it here, as I didn’t do the research. Some notes though, is that the camera apparently wasn’t marketed outside Japan, and was really only advertised to existing Sega customers through magazines as an add-on for the Pri Fun printer and the Picture Magic drawing tablet.
The Specs:
Sensor - ~0.08MP, 320x240 resolution
Shutter Speed - ??? Relatively fast digital shutter, No motion blur in bright light.
ISO - ??? Who really knows.
Lens - ??? Macro mode with knob to manually twist lens.
Memory - 0.5MB 5V Smartmedia card, “ANAND”.
Battery - 4x standard AA.
The Device:
The SJ-1 Digio is a small grey rectangular camera with a similar form factor to some Ricoh cameras like the RDC-2 or RDC-300, you hold it like a pair of binoculars. There’s a 1-stage shutter button, a power button, play/record switch, a couple function buttons, a plus/minus rocker switch, and a physical knob for rotating the lens to adjust focus between Macro and Infinity. There is no zoom.
It lacks an optical viewfinder, but has a built-in digital viewfinder, a small LCD screen set far into the body of the camera behind a plastic window. This somewhat looks like you could hold your face up to it to view the screen, but in reality, you need to hold the camera far away from your face for your eyes to focus on the screen. The screen isn’t terribly bright, so using it this way in direct sunlight is not particularly enjoyable. There IS a clip-on accessory with an eye cup and an adjustable diopter lens in it that allows you to use it like a traditional viewfinder. This makes using the camera significantly more enjoyable in my opinion.

I cannot for the life of me figure out how to change most of the settings on the camera, if any exist (finding a translated manual has thus far been unsuccessful). The Self Timer function is self explanatory and enabled by pressing the “Self Timer” button to cycle through the various timers, which interestingly allows you to set the timer anywhere between 0 and 10 seconds in 1 second increments, which is way more granularity than anyone would ever realistically need. The Memo button switches the camera to “Memo” mode, which I’m unsure exactly what that means. I took a few photos in Memo mode and didn’t notice anything different. Sometimes cameras can record a short audio clip with a photo (again, like the RDC-2), but I can’t seem to locate a microphone on this camera. The “Mode” button doesn’t seem to do anything when pressed, but will bring up a “Delete all” menu when held for several seconds to allow you to format the memory card or delete all the photos. It does this in either Play or Record mode. The “Set” button doesn’t seem to do anything at all. The plus/minus rocker looks like it would activate a zoom function, or adjust the exposure compensation or something, but as far as I can tell, it is only used to navigate between photos in the “play” mode.
The Storage
The camera has no built-in photo memory. It uses a 5V Smartmedia card, and the one it comes with is blue (like Sonic), and only 0.5MB, the smallest capacity camera memory card I have ever seen. It is labeled “ANAND”. Other Smartmedia cards use “NAND” type flash chips for storage (and don’t have this labeled on them prominently like the Sega card does). I can’t seem to find much info about this ANAND, but the card cannot be read by my Fujifilm SM-R1 5V Smartmedia card reader, so I’m thinking that there’s something slightly different about the structure of this card. I have yet to try a standard 2MB 5V Smartmedia card in the camera, but I am nervous about damaging the 2MB card somehow. As of yet, I believe the only 2 ways of retrieving photos off this camera are with the analog TV output and some kind of capture device, or the HDC-3002 Serial accessory.
The camera can store 20 photos on its 0.5MB storage. Well, more like 19 and a half, as the last photo seems to always come out in 160x120 resolution instead of 320x240. I can’t figure out how to manually reduce the resolution, so this is an interesting quirk.
The Photos
Let me lead with a big important asterisk here. *My camera is broken*
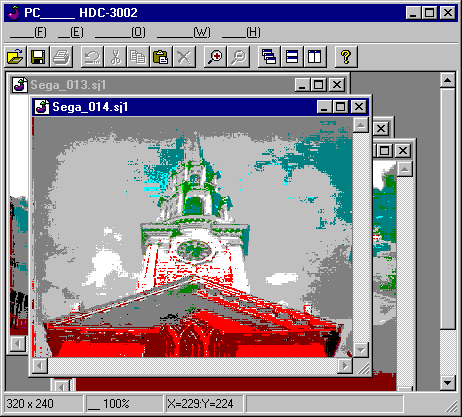
There seems to be something wrong with the automatic exposure circuit in my camera. It IS possible to take normal looking photos, but only in VERY specific conditions. Anything below or above the “perfect” lighting, and the white balance/exposure seem to gradually run away into equally terrible messes of green/magenta smears. It’s also possible to “time” a shot by covering the lens with your finger, then removing it and trying to get the shot right in the middle where the camera is transitioning from bad low exposure to bad high exposure, but I was only able to properly time this twice. Once while doing testing in my living room, and another serendipitous moment out on the town.
I AM trying to track down a working camera, and seem to have a lead, so I will come back and update this if I get some better photos from a working camera.
Here’s the ONE proper photo from my 2 full days of testing across 60 photos.

And here’s some other photos, including the mandatory Providence skyline shot. I tried to “time” most of these in the exposure sweet-spot, but as you can see, it’s a pretty useless exercise.


There’s something to be said about the way this broken camera captures the world. For one thing, at least it is consistent! I wouldn’t say I hate it, but I’d definitely prefer if it just worked normally.
Below, you can see the other photo I timed properly of the light fixture in my living room, and another that I missed the timing.


The Software:
Alright, now to the juicy part. If you want to retrieve the photos directly from the camera, you’re going to need a proprietary serial transfer cable. Sega part number HDC-3002. The cable itself is very proprietary and has a large plastic module in the middle of the cable. The camera connection is a 4-terminal 3.5mm audio jack (where every other camera that I’ve seen use this style of jack has the 3-terminal type).
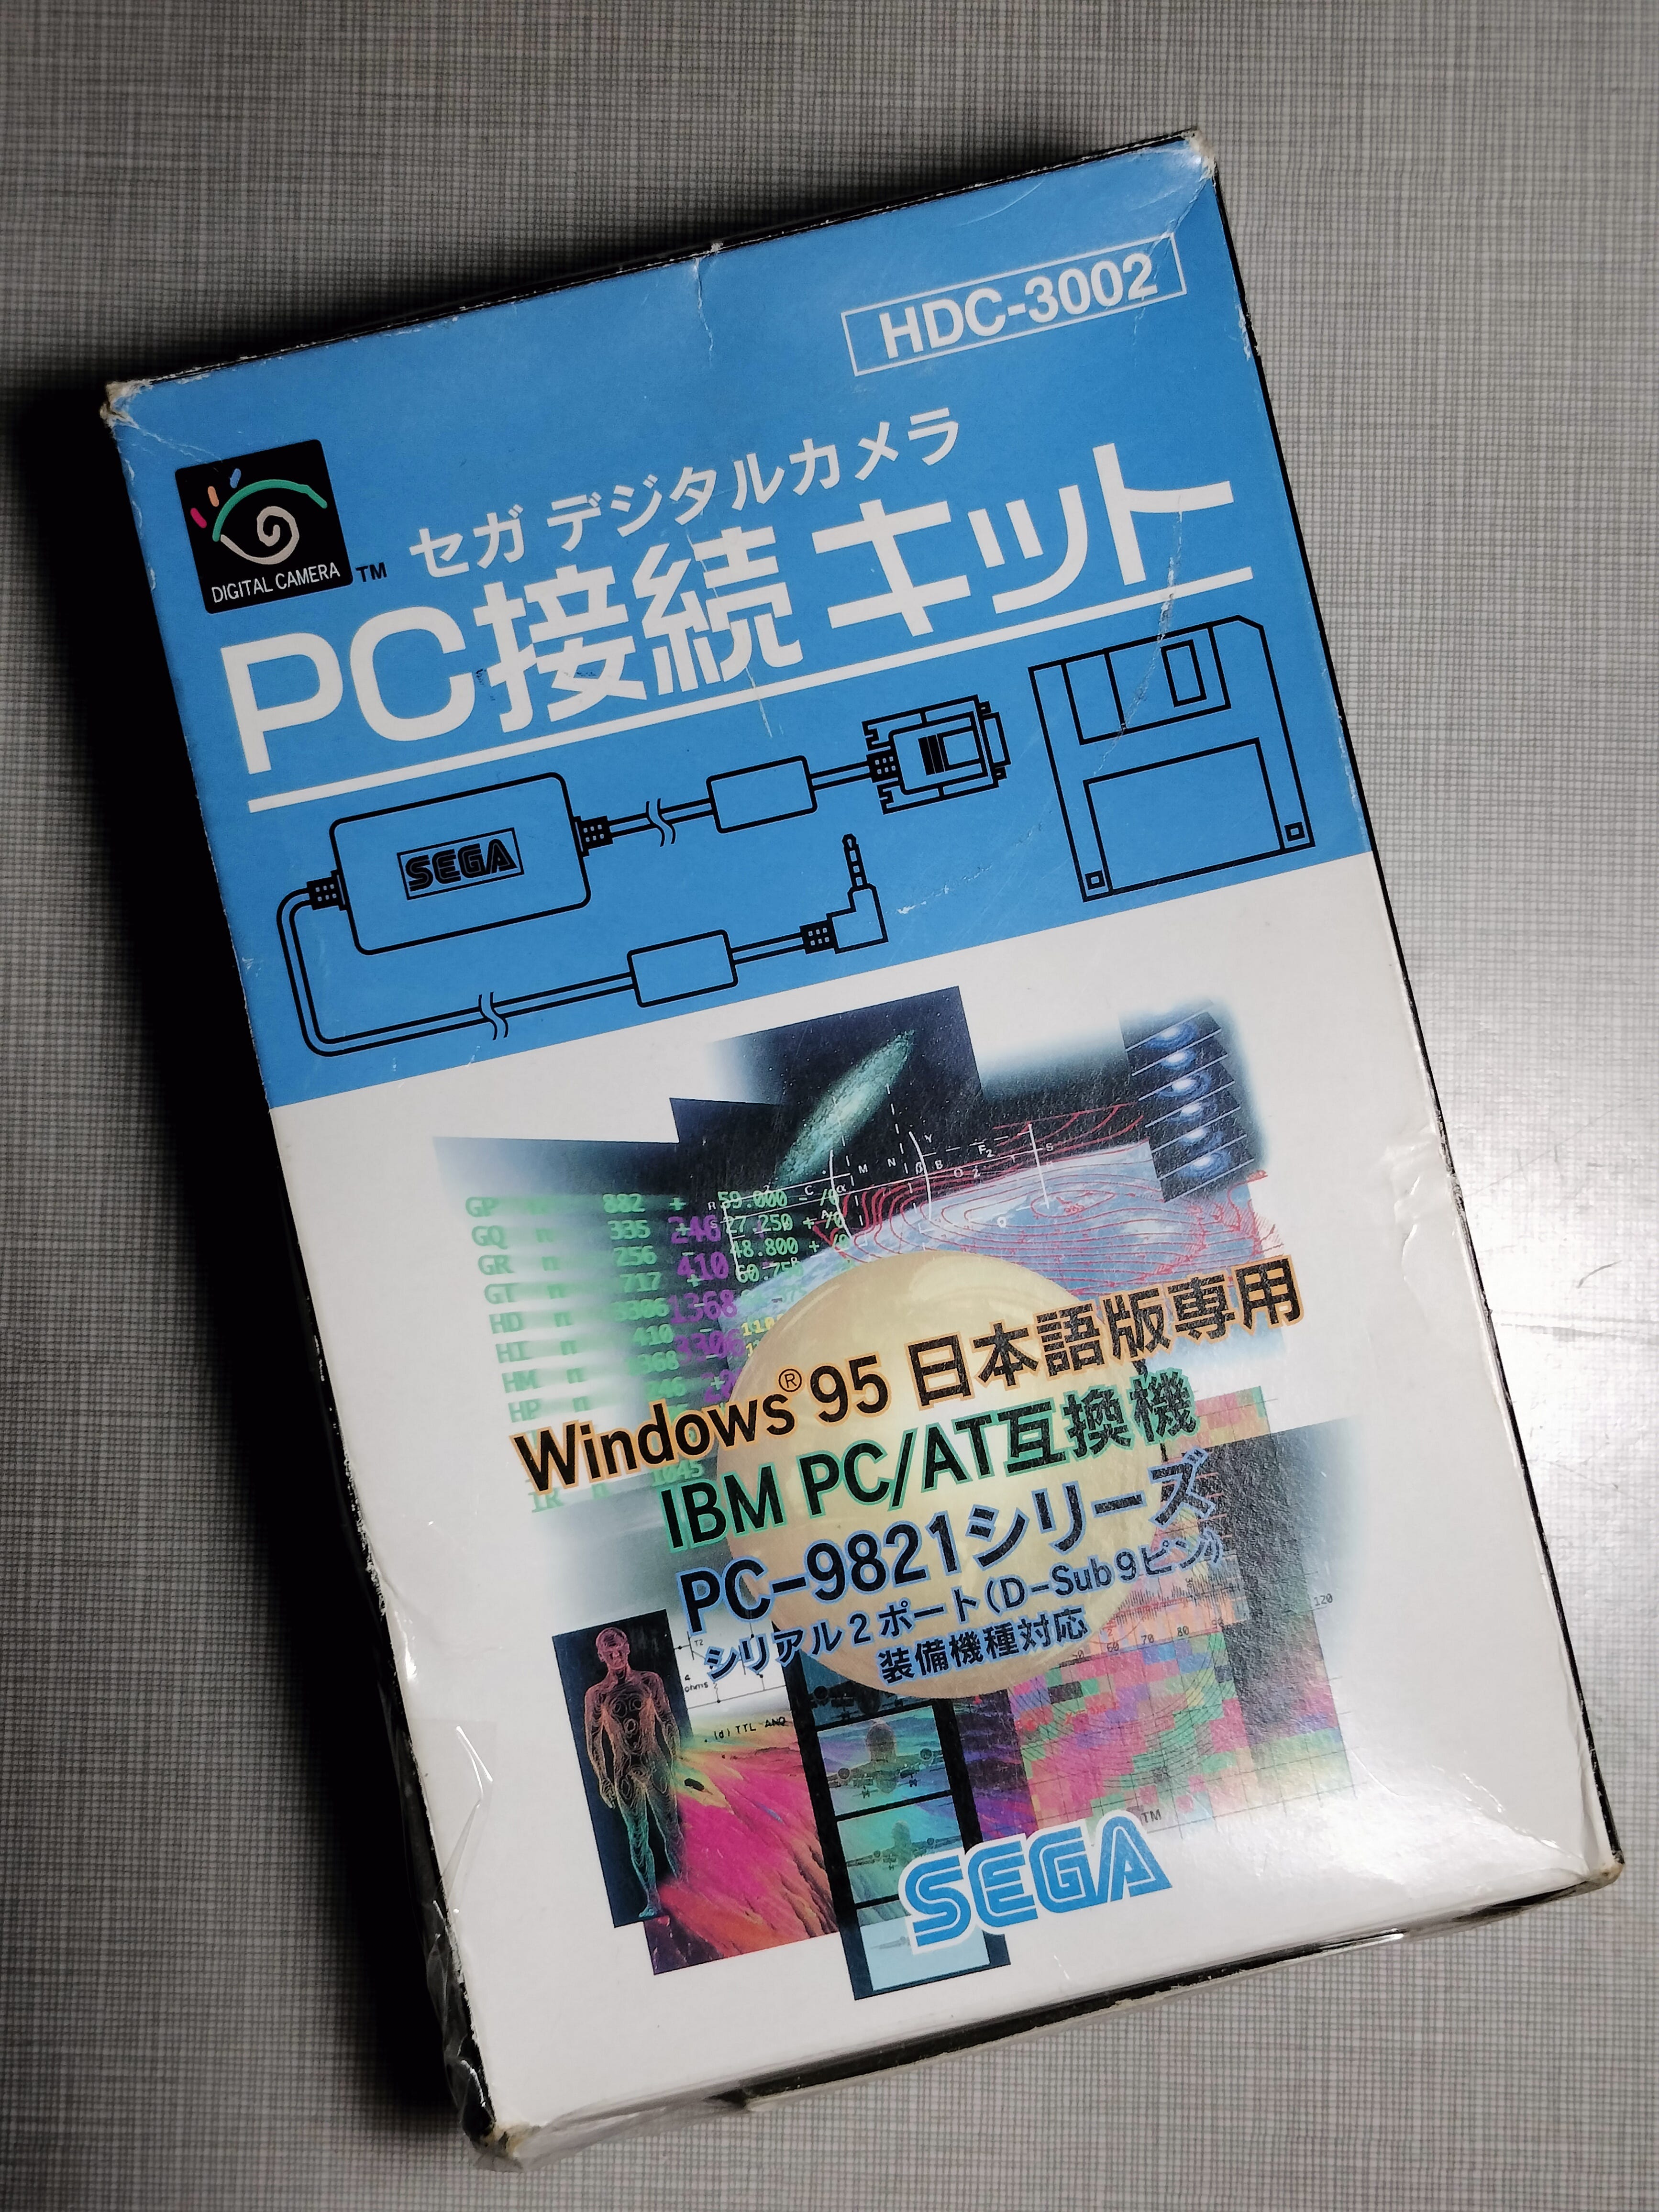
The required software comes on a 1.4MB floppy disk, and is a Japanese only software. I tried to install this on Windows XP and 2000 to possibly get some kind of Japanese character support, but it would not launch after installation, so I just installed it on my Windows 95 machine. If you have a non-Japanese install of Win95, the software WILL install, but you will be greeted by walls of jumbled characters and nonsense. I’ve done this before with Sharp’s Pixlab software, also only available in Japanese, and you just need to trial-and-error your way through using it to develop a procedure for working with it. I’ve outlined the basics below.
Now that that’s out of the way… The software icon is an eggplant.

Seeing as the current interpretation of the eggplant didn’t arise until around 2011, what significance this held is a complete mystery.
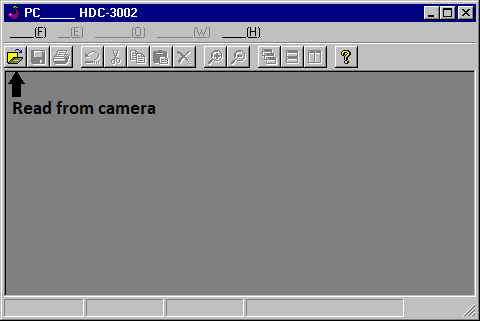
When launching the program, you’re greeted with a mostly empty screen. Connect the camera to the computer with the serial cable, turn it on, and wait a few seconds. Then press the “open folder” button in the top left to read the contents of the camera memory. If you get an error, just try again, sometimes it took a second try for the camera to connect when I was testing this. A window will appear and begin to populate with thumbnails. Ignore the horrific visual quality, my Windows 95 machine is running with extremely limited colors at the moment.
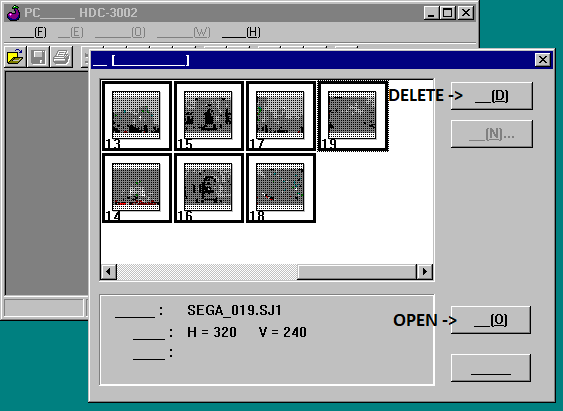
Once the thumbnails have loaded, you can select the photos you wish to download, or click the first, then scroll over and shift-click the last to select all. “Ctrl+A” doesn’t work here. The “D” button deletes the selected photos without further prompt or fanfare, they’re just *poof* gone. So don’t press that button by mistake thinking it means “Download”, ask me how I know this. The “O” button will open all of the photos individually in the main program window.
I haven’t figured out how to bulk-save images yet, so currently the only way I know how to save these images is to hit “Ctrl+S” to save the currently selected image window, then close that image, and hit “Ctrl+S” on the next window. This reminds me very much of the Mitsubishi DJ-1000 software that also completely lacks (functional) bulk saving. I will continue to investigate the user manual to see if I can determine any additional features of this software, but so far, that’s all I’ve got.
The Verdict:
Well, my camera is broken, so I can’t get the whole picture (no pun intended), but it’s a goofy camera that not many people know exist, and even with it bring broken, the photos are interesting in their own way. I’ll give it 7 floating golden rings out of 10.
I will certainly make an effort to update this with new information I discover about the software, if I can come up with a way to scan and translate the user manual I have, or if I find a functioning camera.
Thank you for reading! A second article, wow! Part of me never thought I’d get around to it. I just need to keep this momentum going.